The Pit Mapper (beta) interface allows event managers to design a user-friendly pit map within Nexus. These pit maps can then be used within Nexus by teams & volunteers.
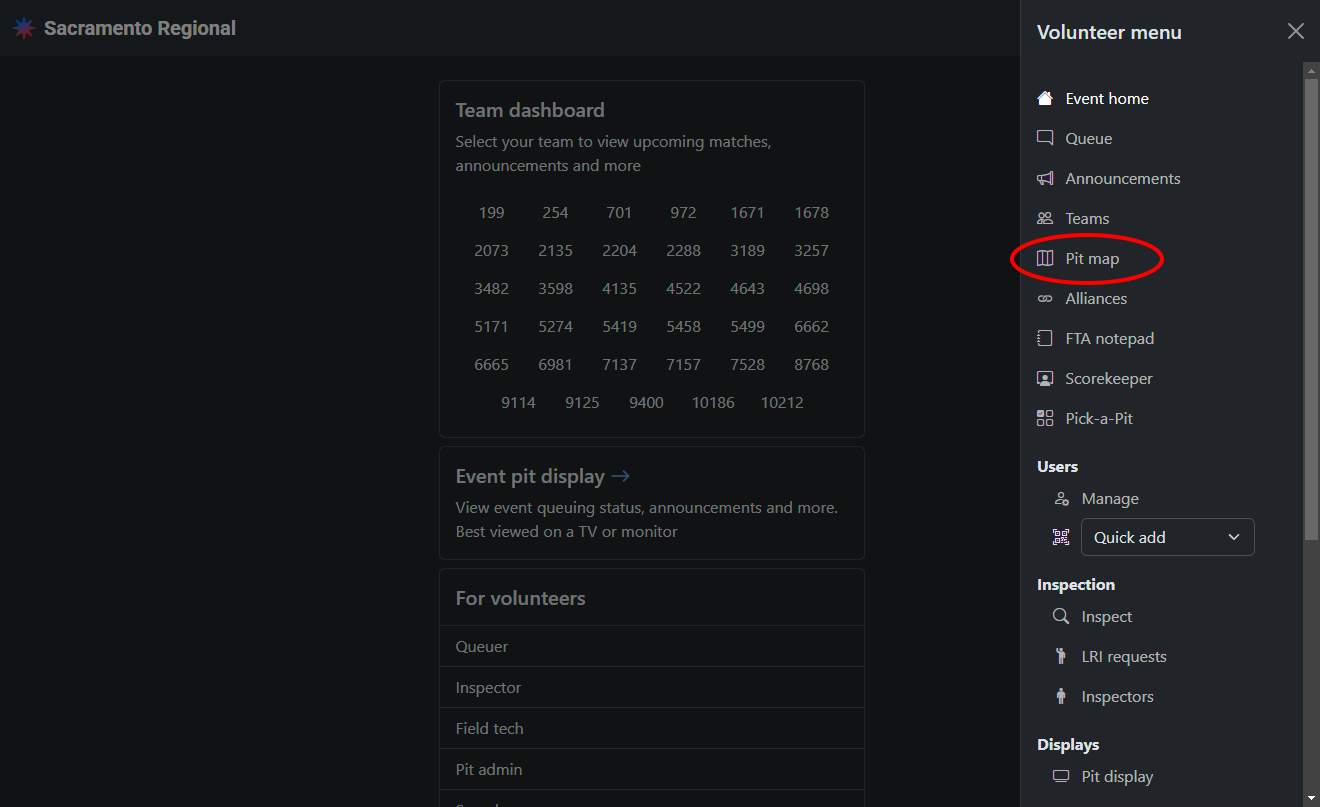
Access
Users with any of the Lead queuer, Lead robot inspector, Pit admin, or Pick-a-pit admin roles have permission to edit pit maps. Select “Pit map” in the volunteer menu.
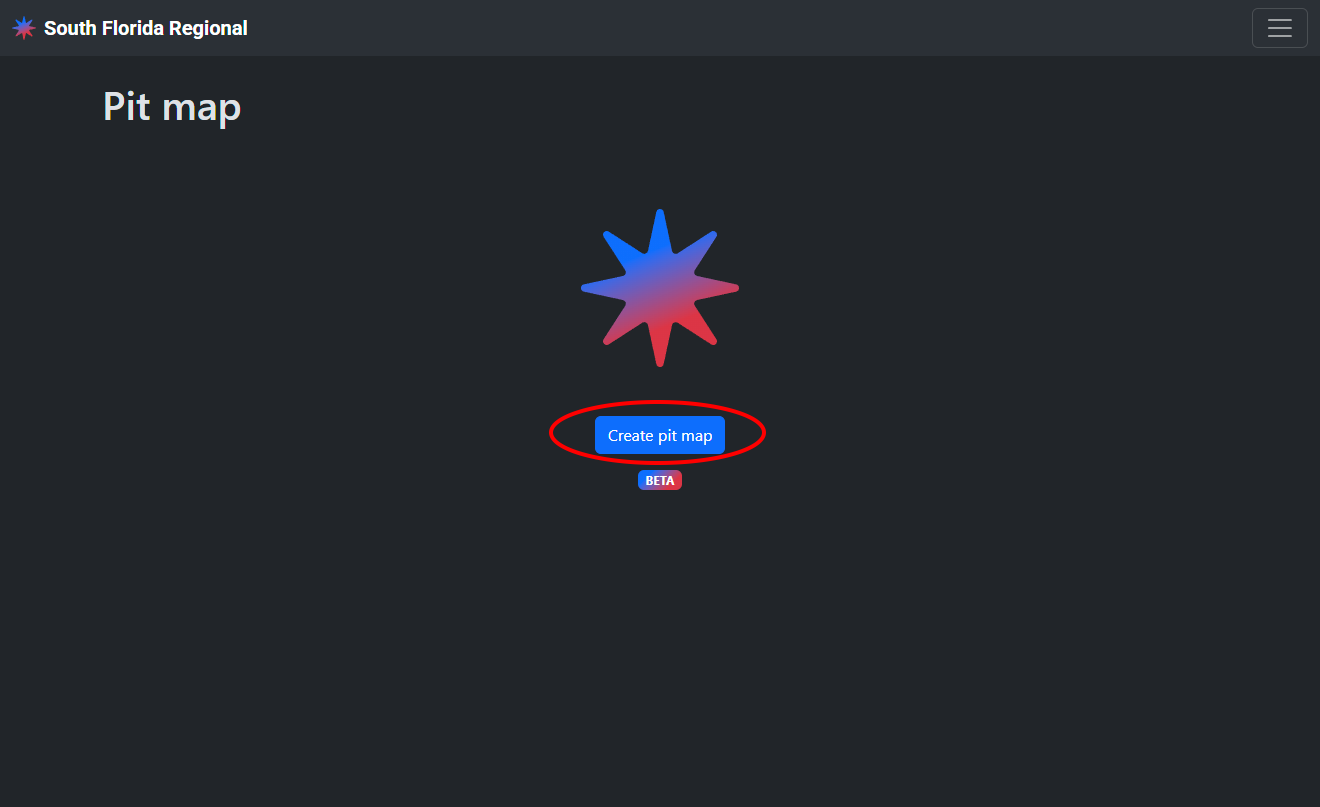
Design the pit map
Note: designing a pit map can’t be done on mobile devices
Using a reference map of the venue, use the Pit Mapper interface to design the pit map. Start by adding and arranging all pits.
Tips:
- Do not aim to make a 100%-to-scale representation of your venue. A simplified version is usually easier for teams to view, especially on phones.
- Focus on the pits area. Unless your pits surround the field, do not include the full field in the map. Full-venue maps are usually too large to optimally present to teams in this format.
- For optimal viewing, design your map in portrait orientation. This will be the default orientation, and users can rotate the map to their preference.
- While moving elements around the map, hold ctrl to disable snapping
- Use arrow keys to move selected elements around. Use shift + arrow keys to nudge elements by 1 pixel.
After adding all pits, also add as needed:
- Add relevant areas, such as pit admin and inspection. These help teams align the map to real life and help them find important areas
- Add walls to indicate separate rooms or areas that can’t be traveled through by teams
- Tip: Use the “Surround selection” option in the walls menu to build inclosed rooms quickly
- Indicate doorways through walls with double arrows
- Indicate the direction that teams would travel to queue towards the field using a single arrow and label
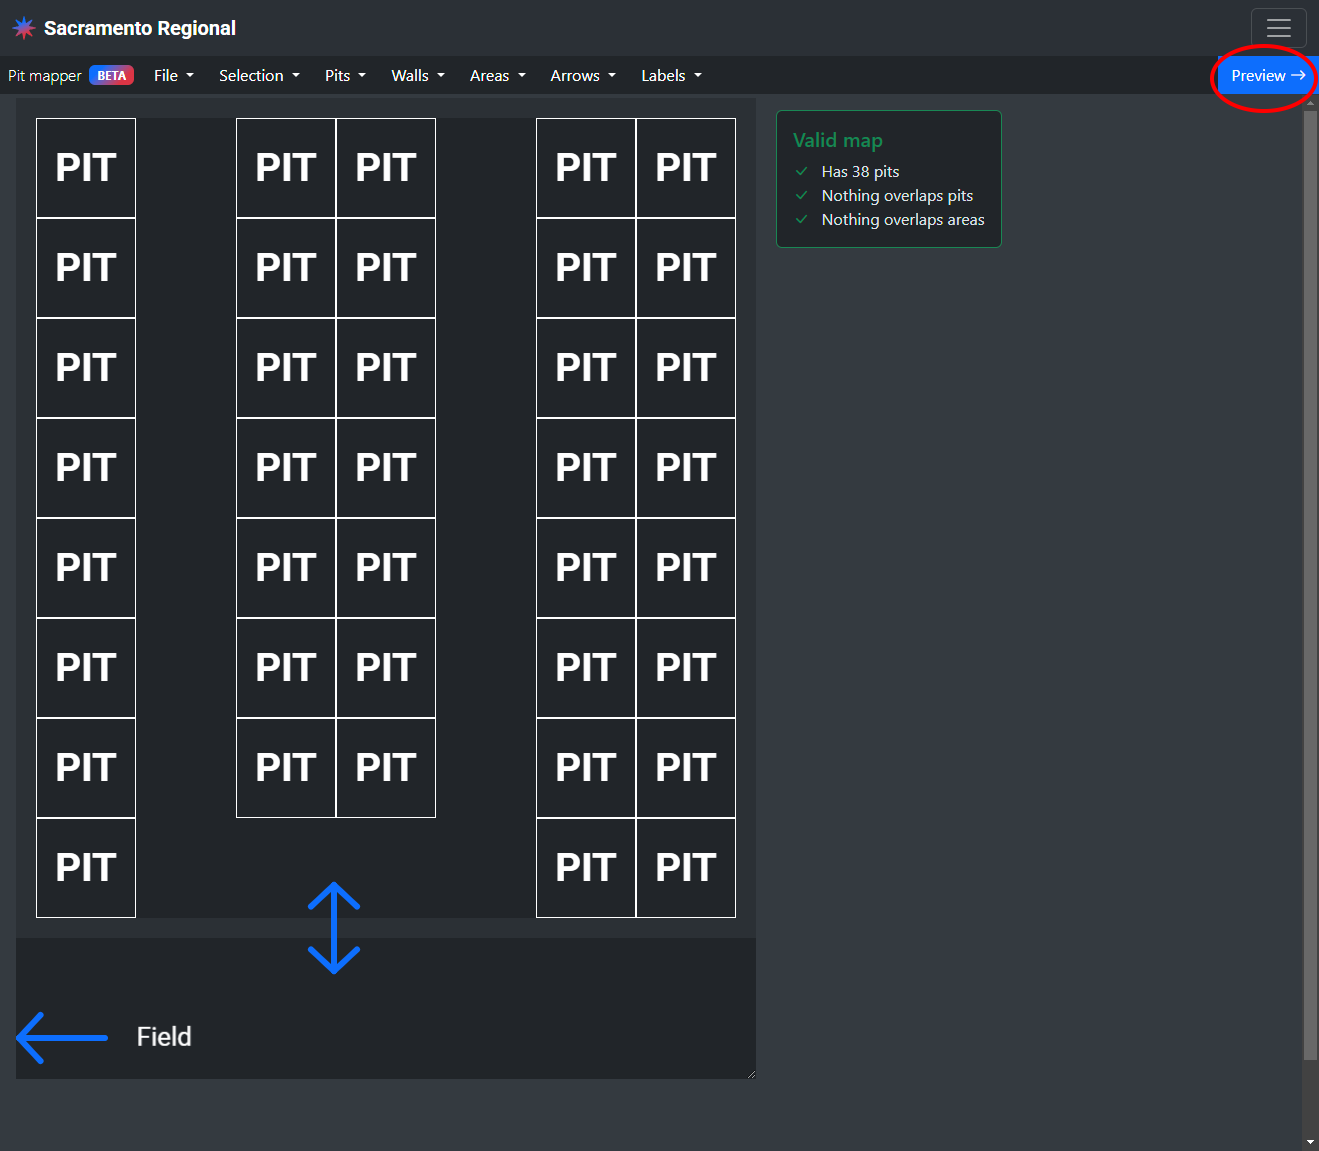
Once your map is set and valid, click “Preview” to continue to the next step.
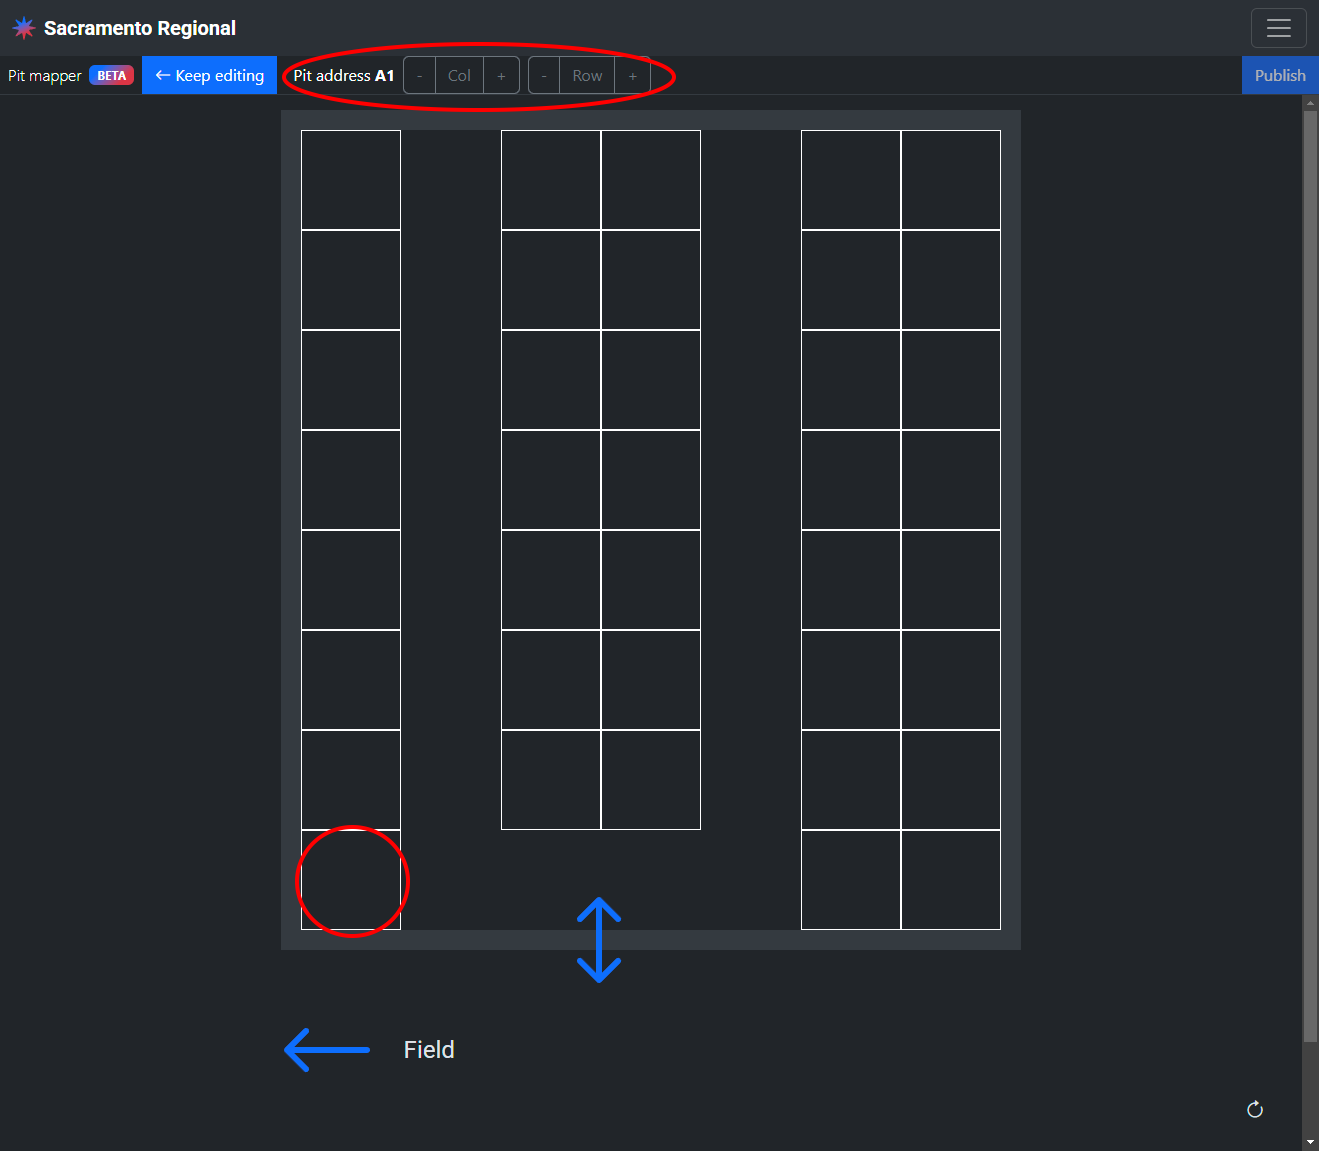
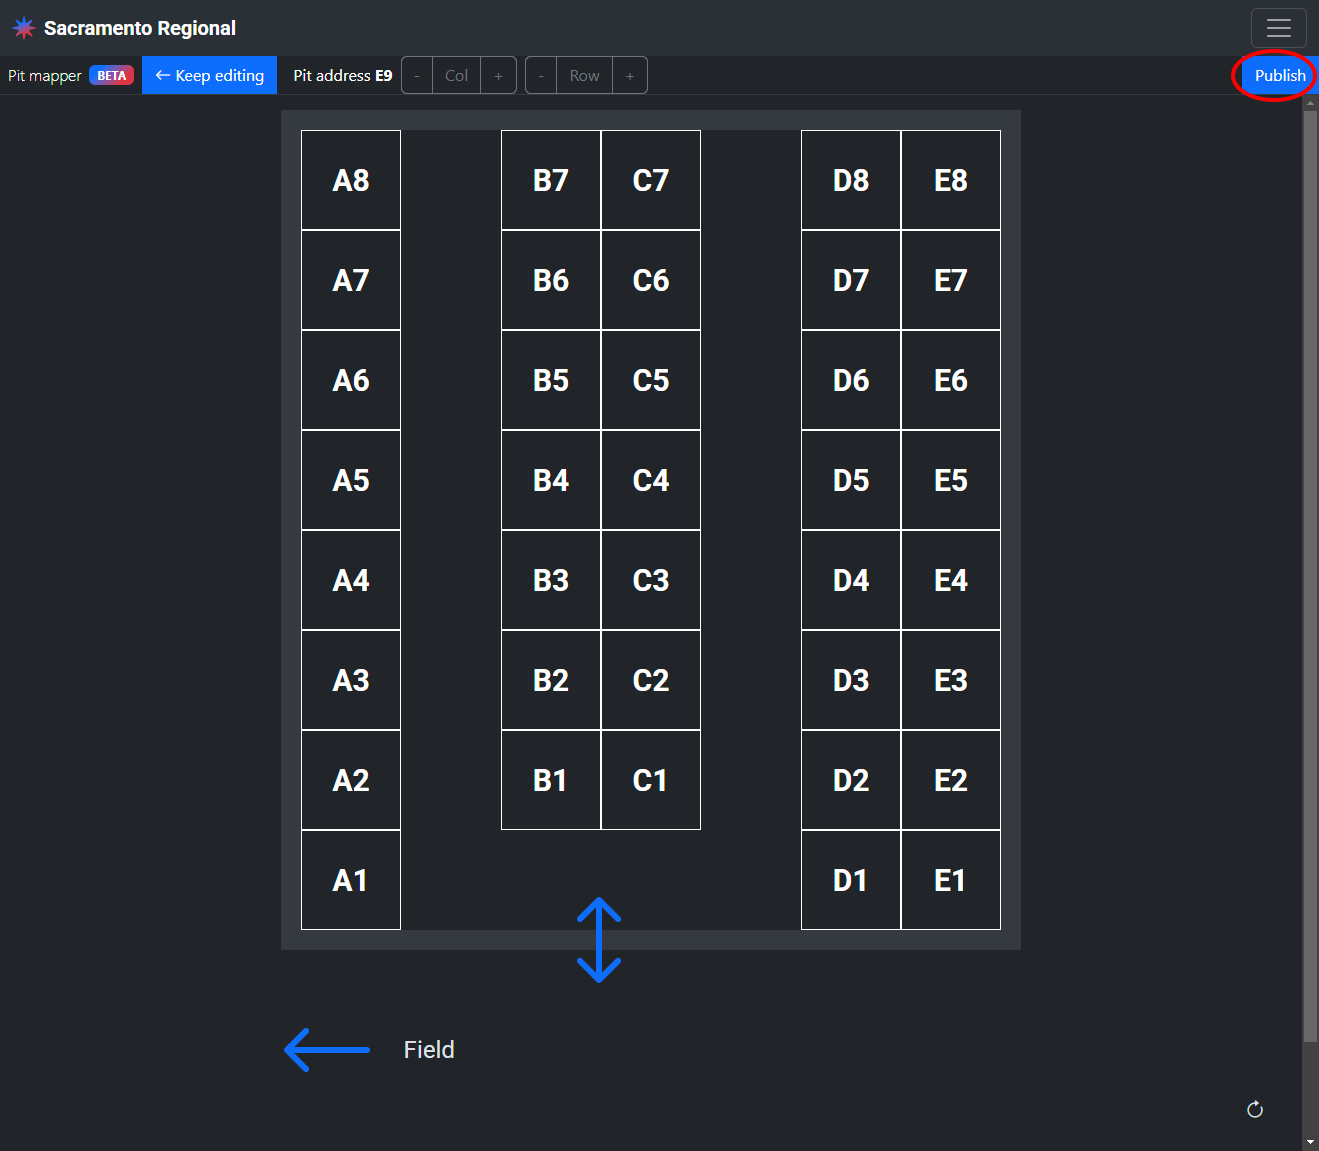
Assign pit addresses
Assign each pit a unique address (such as “A1” or “A2”) by clicking on each pit. Change the current pit address that you are assigning using the column and row buttons at the top.
Generally, the closest pit towards the field should start at “A1”. Change the letter and restart the numbering for each row of pits.
Publish
Once every pit is assigned an address, click “Publish”.
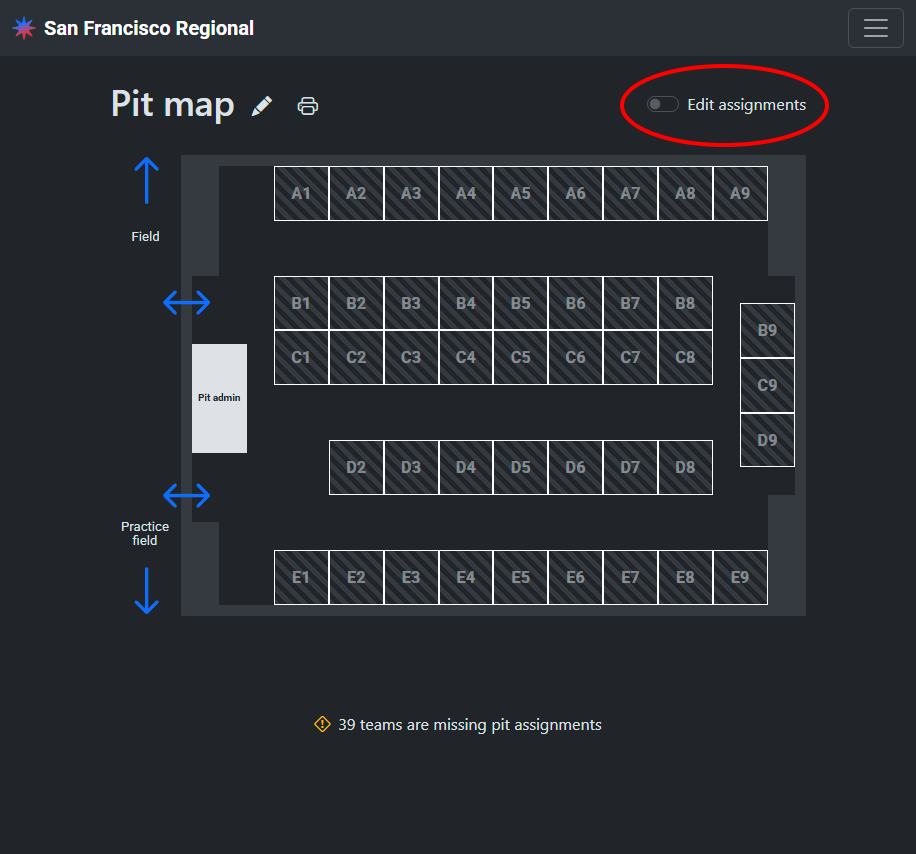
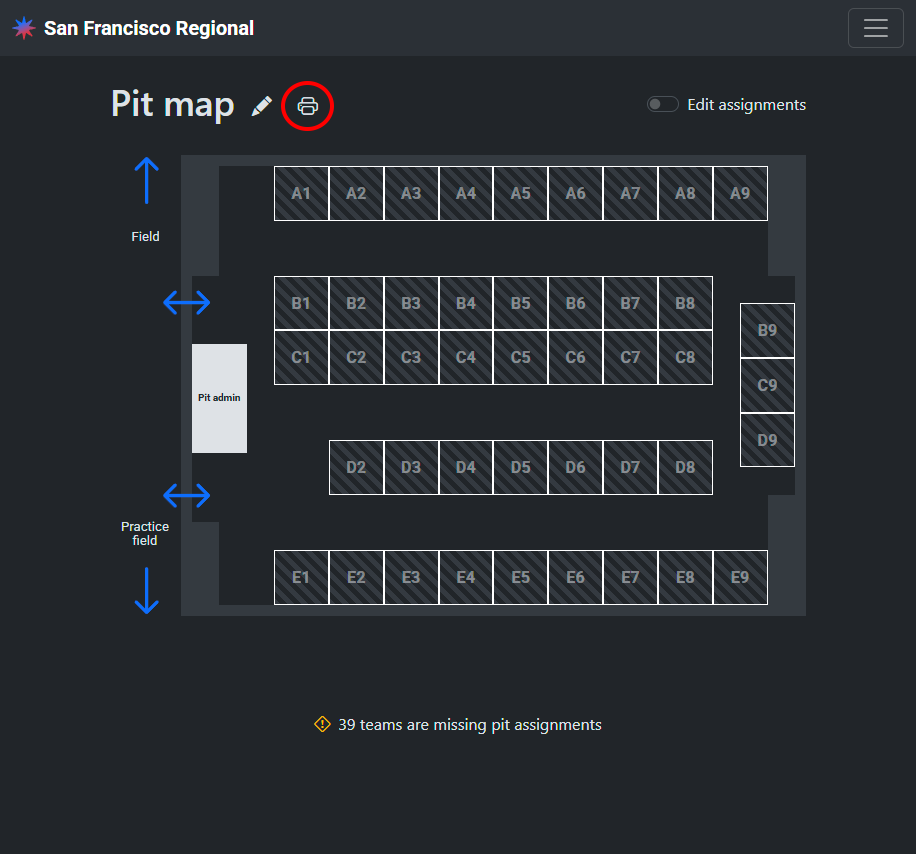
Assign teams to pits
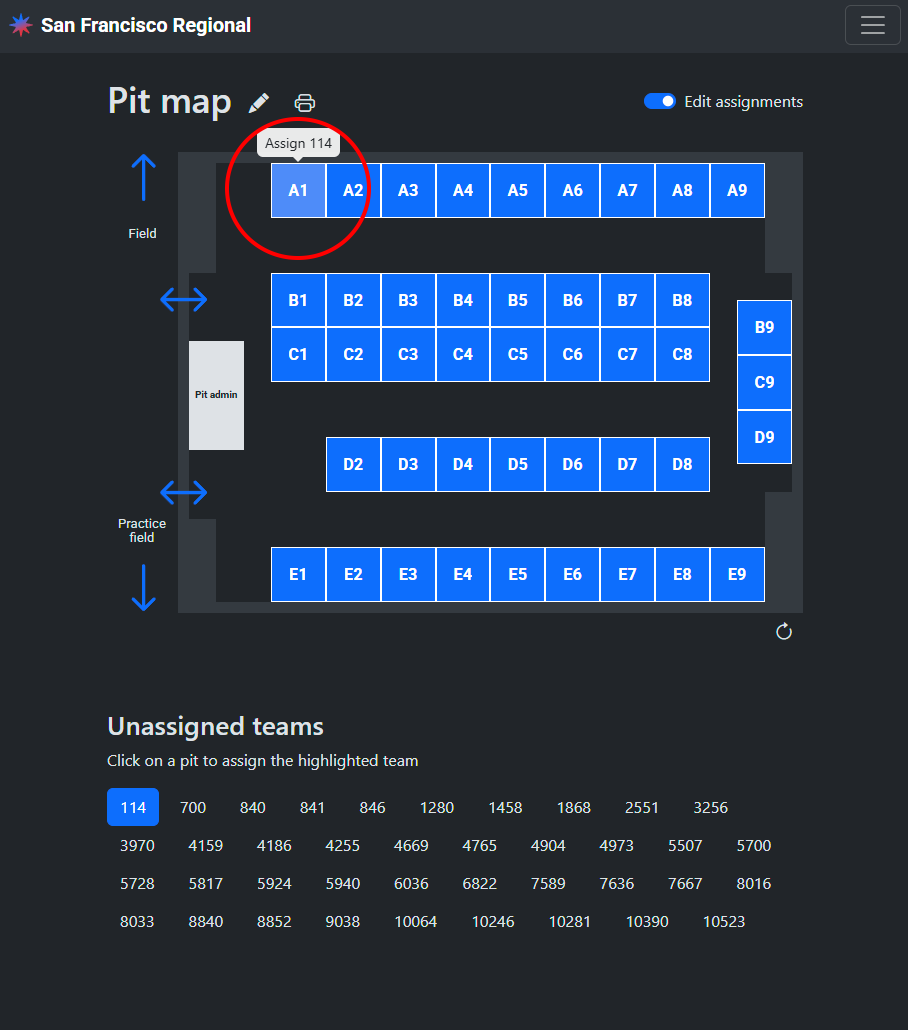
Once you are ready to assign teams to specific pits, click the “Edit assignments” toggle in the top right of the pits page to enter team assignment mode.
The lowest team number will be automatically selected in blue. You can change the next team to be assigned by clicking a different team number in the “Unassigned teams” section.
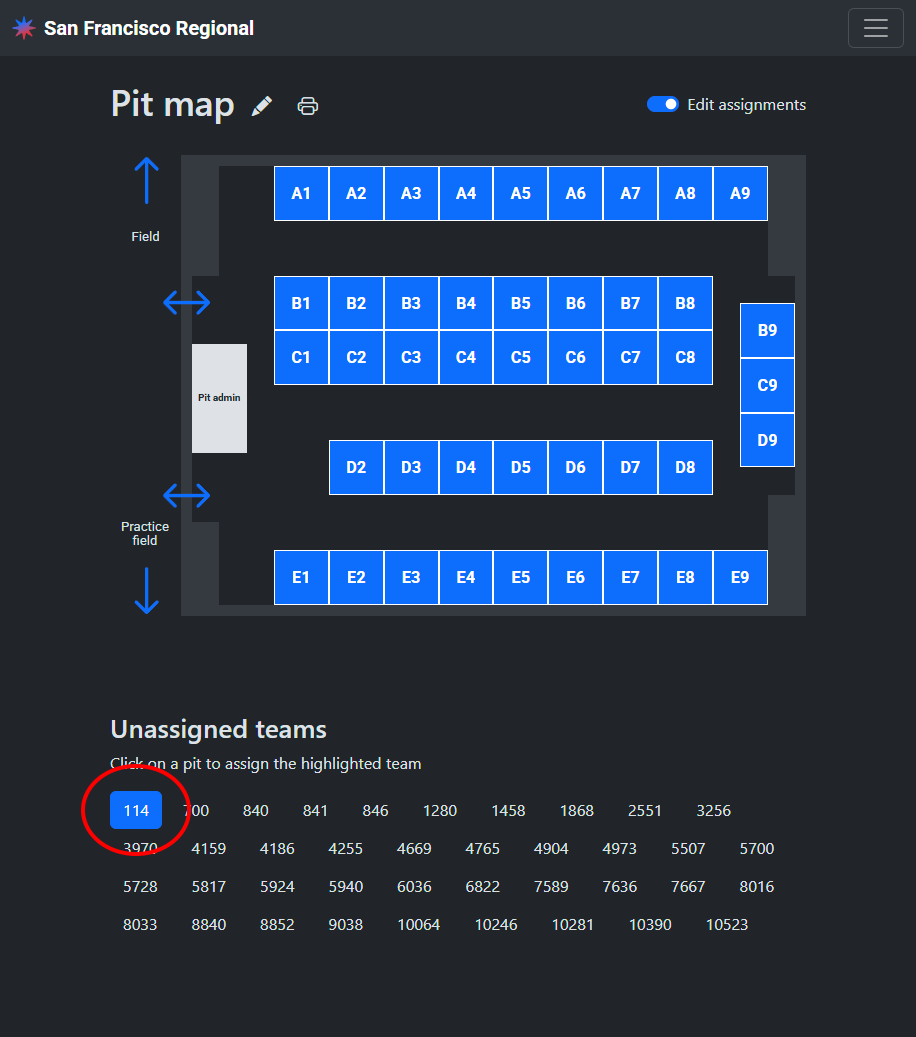
Click on a pit in the map to assign the currently select team to it. If there is already a team assigned to the pit, they will be unassigned.
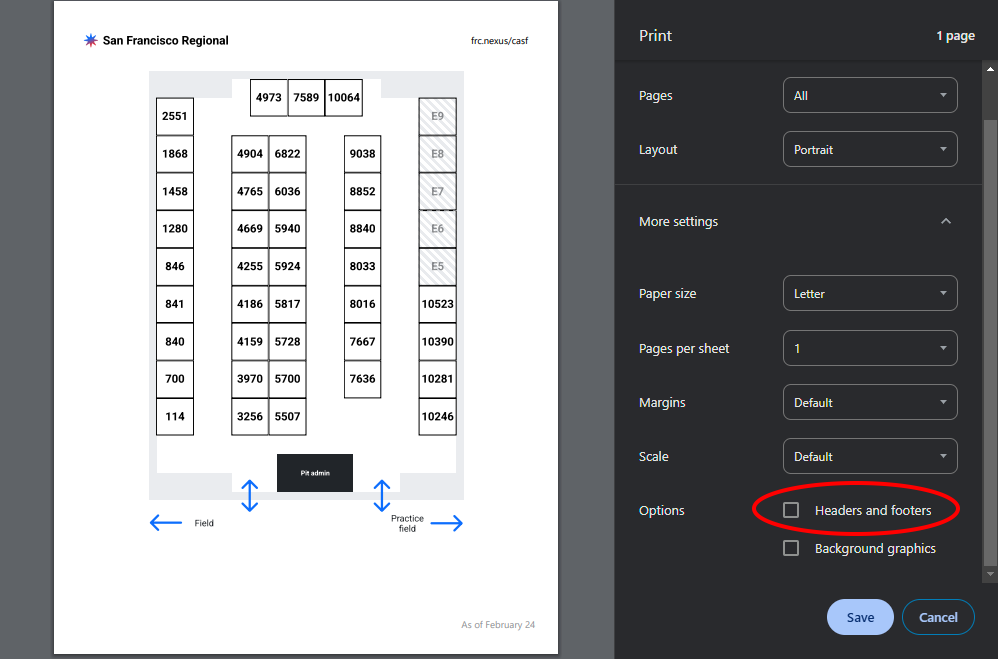
The pit map can be printed or saved as a PDF from the pits page.
A header and footer is included within the document, so uncheck the “Headers and footers” option if necessary.
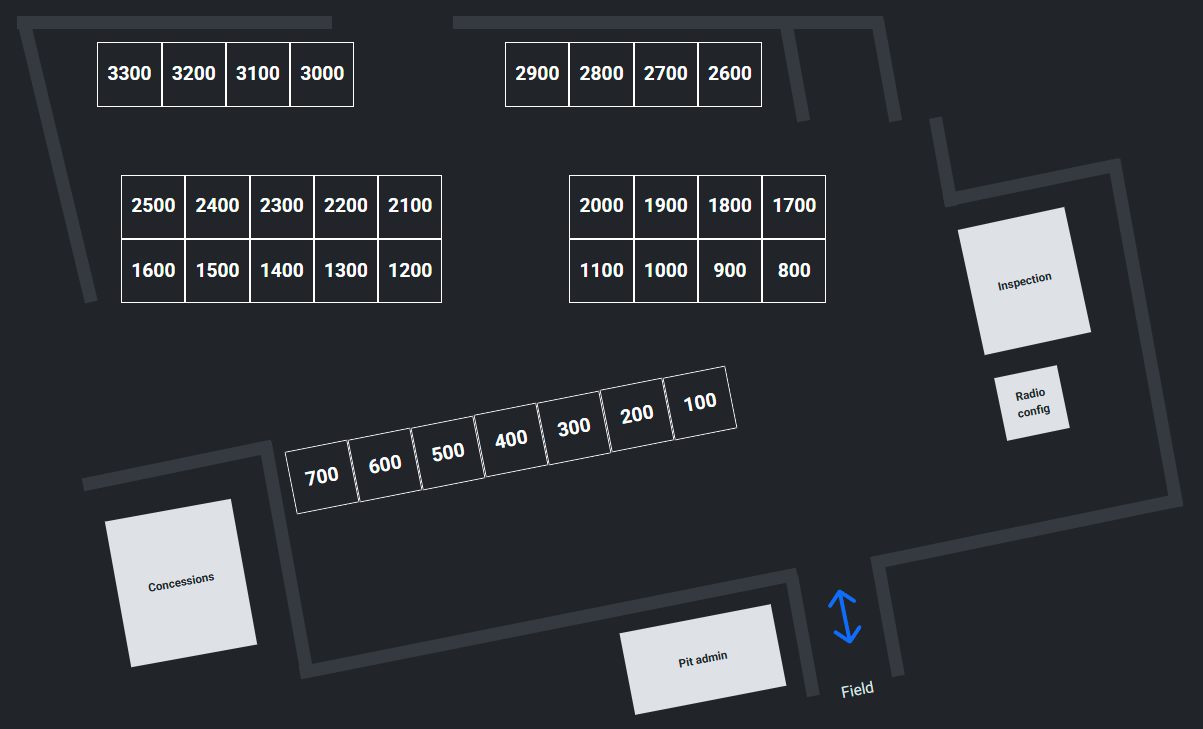
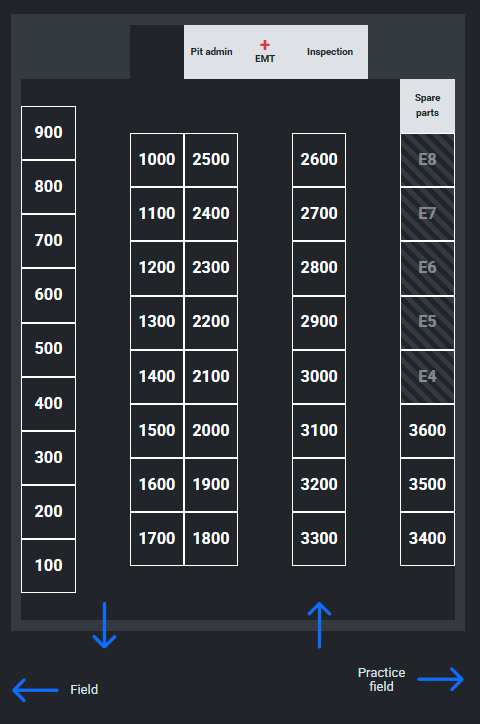
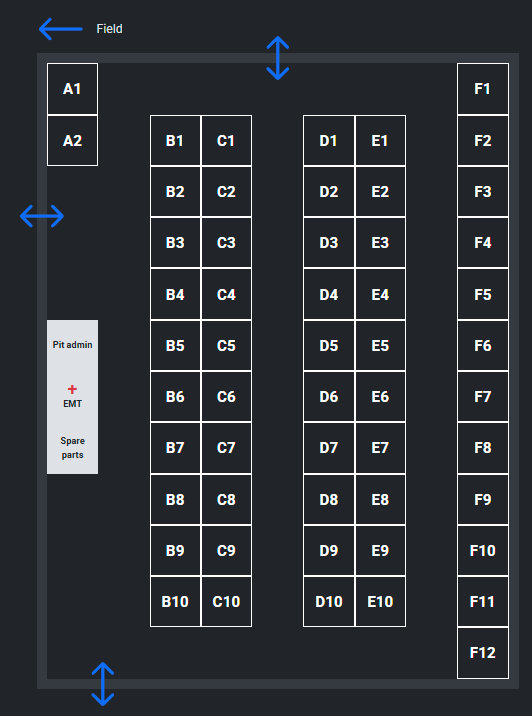
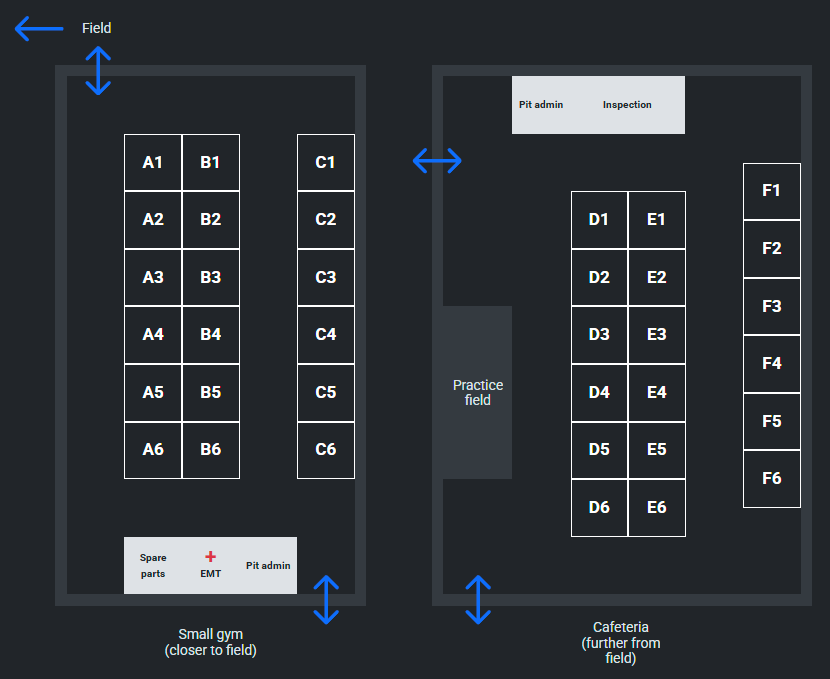
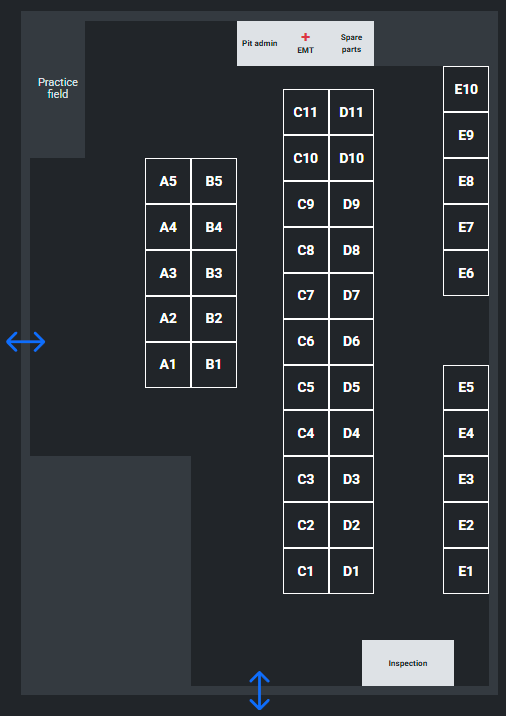
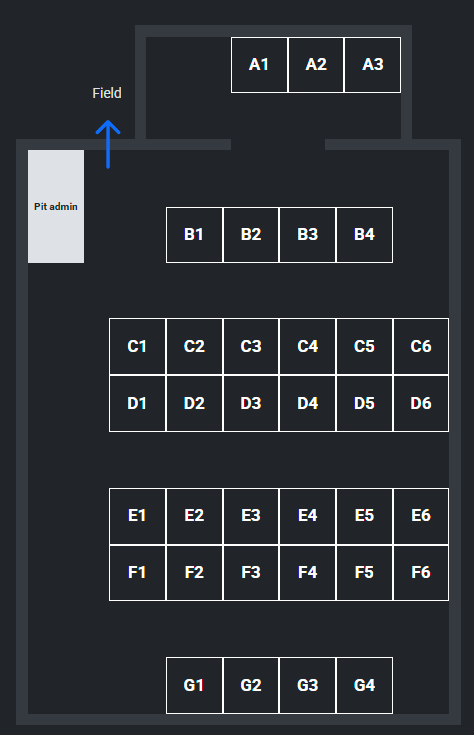
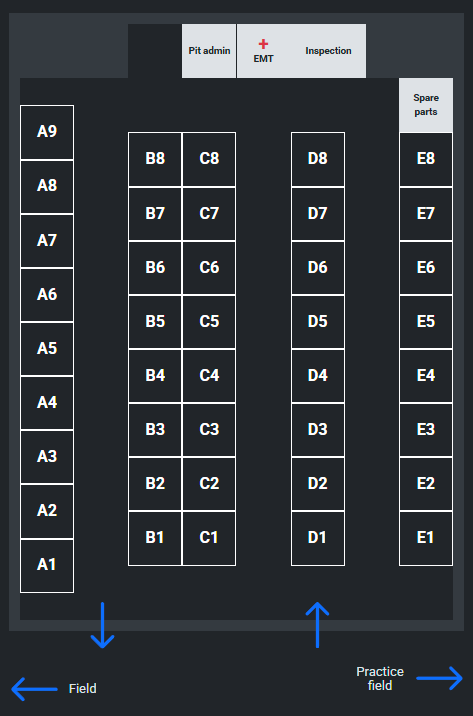
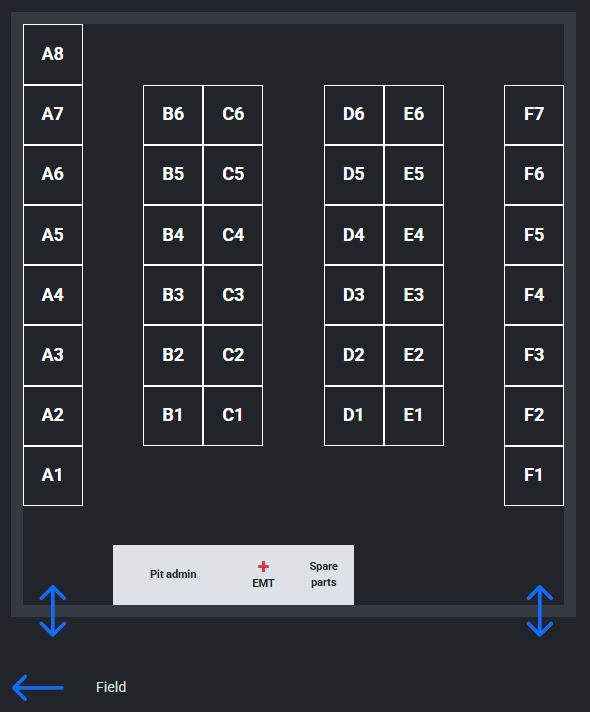
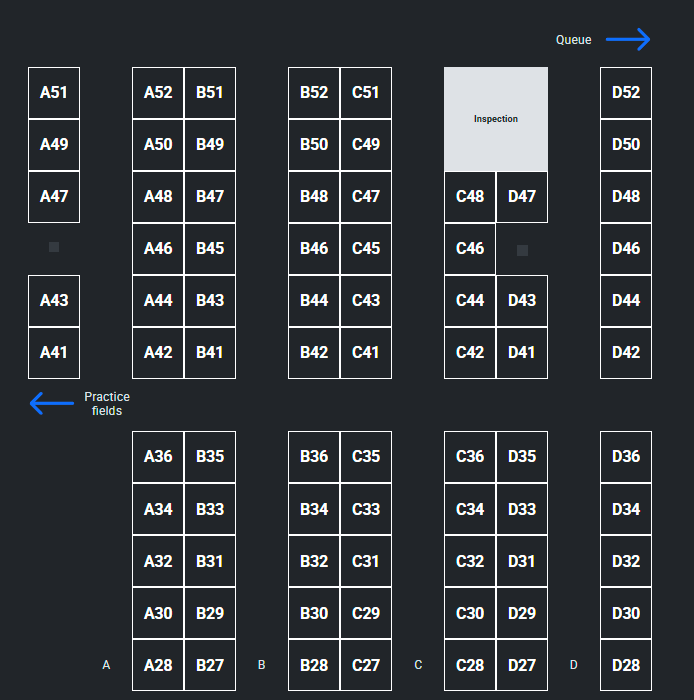
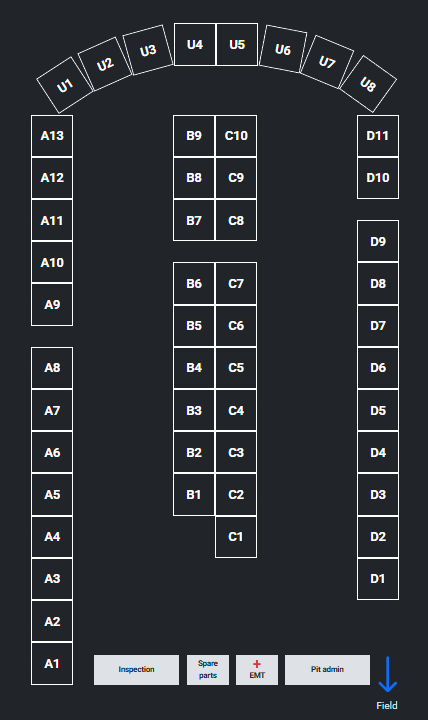
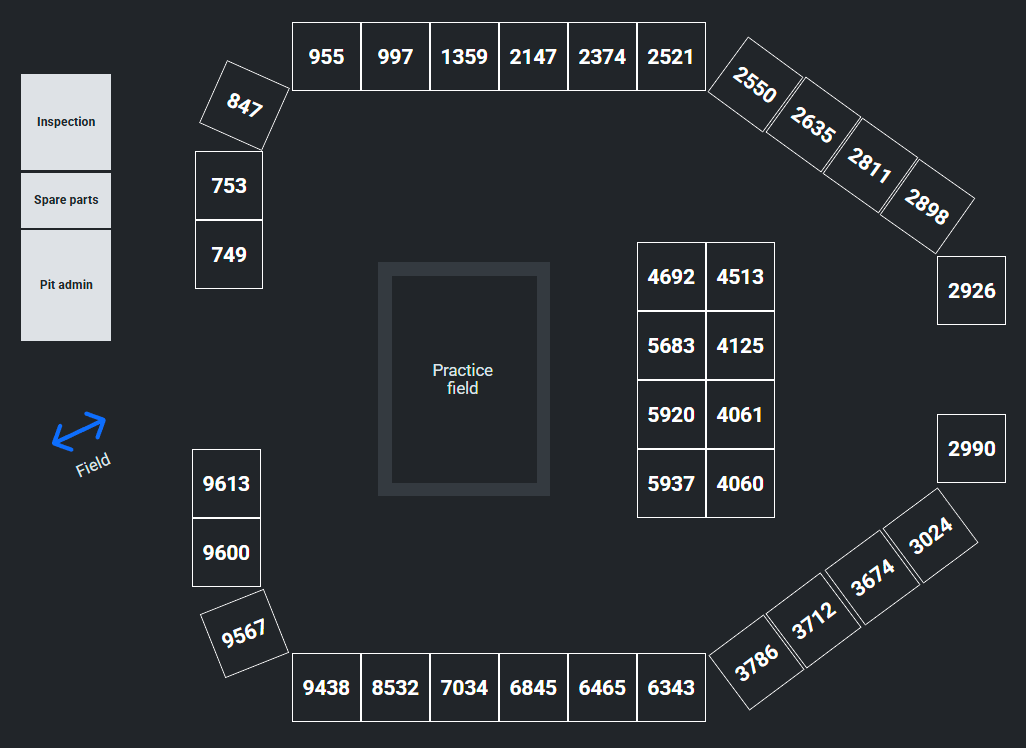
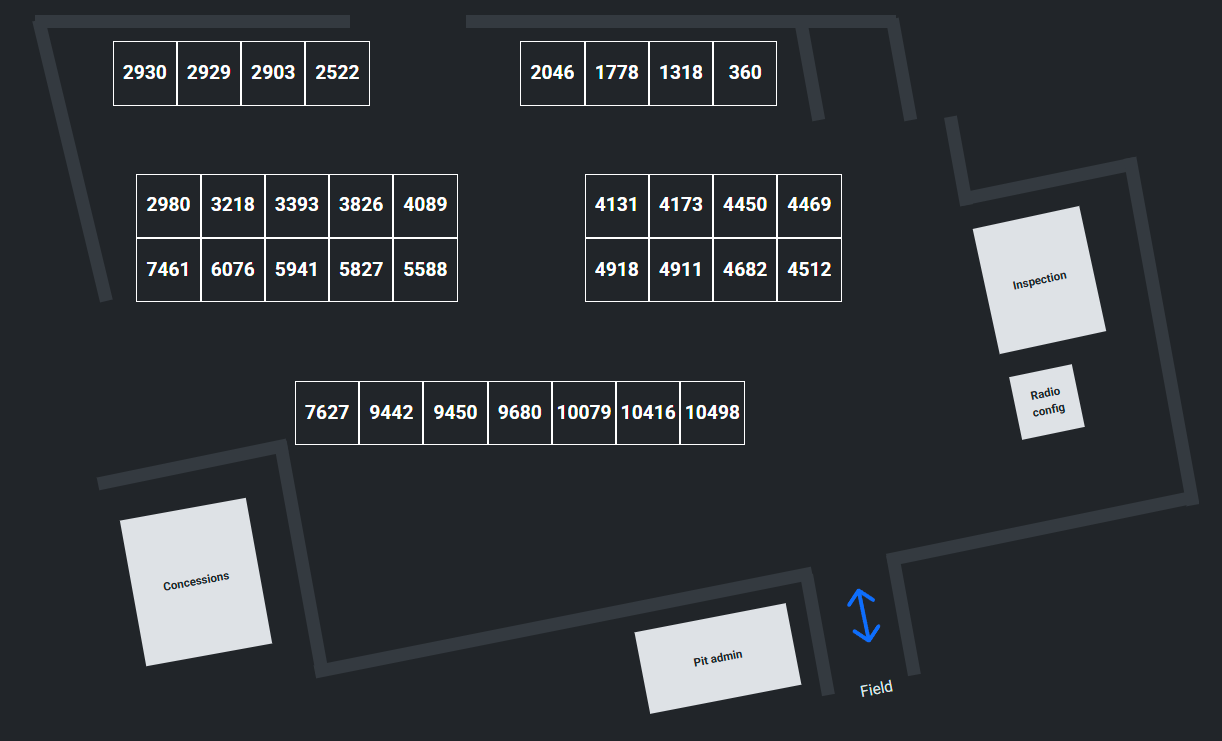
Examples
For reference, here are some maps for real events!